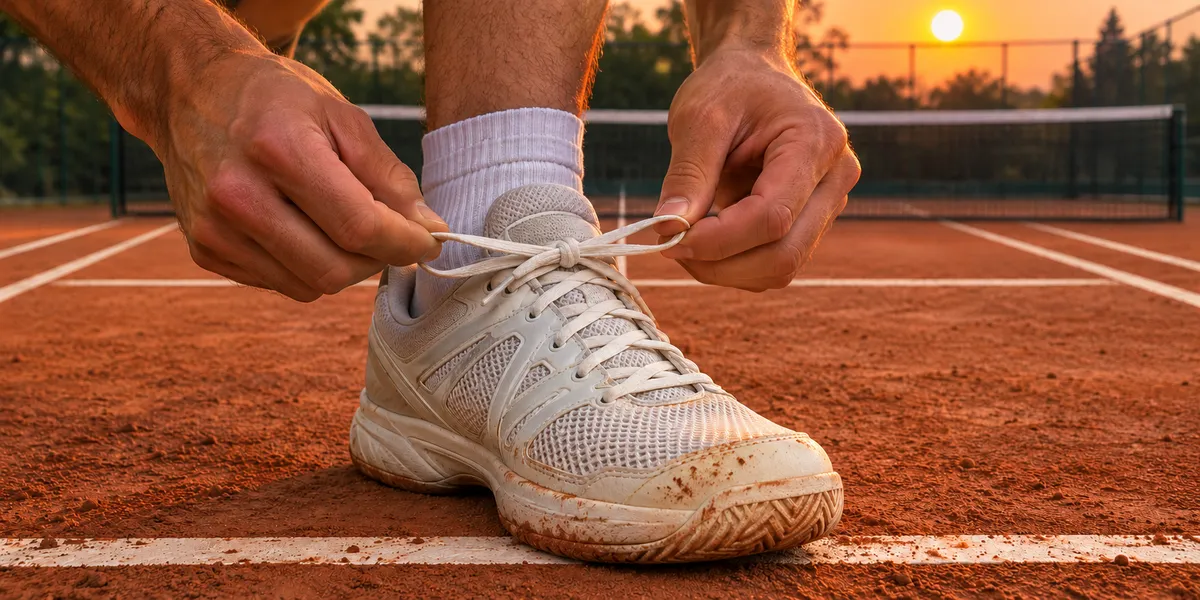
How to Lace Tennis Shoes for Heel Slip and Pressure
You brake for a wide forehand and your heel lifts inside the shoe. You tighten the laces, but now they press into the top of your foot. Before making the same adjustment at the next changeover, work out which part of your foot needs holding and which part needs room.
For a small amount of heel slip, try heel lock lacing. If the upper presses down on your toes, diagonal lacing is an option. If the crossing laces squeeze your instep, straight bars change the way the lace runs over that area. If your toes hit the front, or your foot stays squeezed even with the laces loose, check the size and shape of the shoe. No lacing pattern makes it longer.
Choose a lacing pattern by what you feel on court
With the shoe on, loosen the laces and tighten them again from the bottom, one row at a time. This lets you check whether the problem came from pulling only on the two ends at the top. Cedars-Sinai recommends adjusting from the eyelets nearest your toes and starting with footwear that feels comfortable when you first try it on.
| What you notice | What to try | When to reassess the shoe |
|---|---|---|
| Your heel lifts slightly, but the rest of the shoe fits | Heel lock using the top eyelets | You have to tighten until it hurts, or there is still substantial movement |
| The upper presses down on your toes | A long diagonal starting on the big-toe side | A toe hits the front, or pain remains after you loosen the laces |
| Crossed laces press into your instep, the top of your foot | Straight bars with moderate tension | Your forefoot still feels squeezed with the laces loose |
| The bow loosens even though the shoe fits well | Check the knot; the Berluti is an alternative | The lace is worn or its ends are too short to tie properly |
For tennis, a fit check needs to include lateral steps and gentle stops. Walking to the court will not tell you whether your foot slides forward when you brake. Outsole choice is a separate decision: our guide to tennis shoes by court surface explains what to look for.
Follow the lace through the interactive guide
Choose the fit problem, count your eyelet pairs and move through the steps at your own pace. A pair means one eyelet on each side, not two rows. Blue and yellow identify the two ends of a single lace; its shared starting section is grey. The shoe is viewed from above, with the ankle at the top and the toes at the bottom.
Lacing workshop
Follow the lace, eyelet by eyelet
Two colors identify the ends of one lace. Row numbers start at the toes.
Heel lock lacing
Blue dot: big-toe side
Step 8 of 8
Take up the slack in the loops and bring the ends to the centre for tying. The diagram leaves the loops open so you can see the route.
Include the top two eyelets on each side. Leave slack in the loops before threading the ends through.
See the original technique ↗Dashed lines show sections that run underneath the sides of the lacing area; solid lines run over the top. The blue dot marks the big-toe side. Switching feet also reverses the diagonal. The guide shows the lace route: the heel lock loops remain open so you can see them, even in the final step.
1. A slipping heel: heel lock lacing
This method uses the top two eyelets on each side to form small loops. Each end passes through the opposite loop before you tie the knot. The aim is to take up slack at the top while keeping the forefoot comfortable.
Ian Fieggen’s Lock Lacing tutorial includes several finishes. The interactive guide uses loops between the second-from-top and top eyelets:
- Lace in a crisscross pattern up to the second-from-top pair, keeping the tension comfortable.
- Take each end to the top eyelet on its own side and feed it inward. Leave a small loop on the outside.
- Cross the ends and pass each underneath the opposite loop.
- Gently take up the slack in both loops, then tie your knot.
Start here if your heel has a little room to move but the shoe otherwise fits. If you need to pull the laces painfully tight to hold it, reconsider the size or try a shoe with a more suitable heel shape. Fieggen makes that distinction: a lock can help with minor heel slip, but it has limited scope when the fit is substantially wrong.
Stop tightening if you feel uncomfortable pressure. You want a more secure heel with room left for your toes, rather than the tightest laces you can manage.
2. Pressure on your big toe: diagonal lacing
One end travels almost the full length of the shoe in a single diagonal, from the lowest eyelet on the big-toe side to the highest eyelet opposite. The other end fills the remaining rows. ASICS recommends diagonal lacing as a way to give toes more room. That is a manufacturer’s fit recommendation, not evidence that the pattern resolves every cause of toe pain.
To thread it:
- Remove the lace. Place its bottom section horizontally across the outside of the first row, with both ends feeding inward.
- Take the end on the big-toe side underneath the lacing area and out through the top eyelet opposite. Leave enough length there to tie the knot.
- With the end still at the bottom, travel diagonally underneath to the next eyelet on the big-toe side and bring it out.
- Go horizontally across the outside and into the matching eyelet. Repeat that hidden diagonal rise and outer horizontal bar until you reach the top; on the last row, simply bring the end out.
- Adjust the fit and tie the bow without hauling on the long diagonal end.
This is the long-diagonal version of Fieggen’s Shoe Shop Lacing. His page documents the route and notes that it can pull the sides out of alignment; it does not claim a therapeutic effect. Watch how your shoe sits as you tighten it.
Direction matters: on both feet, the diagonal needs to start beside the big toe. Copying the same diagram onto the other shoe without reversing it changes that starting point.
If your toe hits the front when you stop, also check whether your foot is sliding forward. If the toe box is already too short while you are standing, change the size or model. If pain persists after you remove the shoe pressure, seek advice from a healthcare professional before trying more lacing adjustments for play.
3. A tight instep: straight bar lacing
Straight bars replace the outer crosses with horizontal sections. The rising sections stay hidden along the sides. Fieggen describes straight bar lacing as a way to relieve pressure over the top of the foot.
It is worth trying when the laces squeeze your instep. Calling it a fix for a foot that is “too big for the shoe” confuses two problems: you can redistribute lace pressure, but you cannot widen the sole or add space in front of your toes.
Select six pairs in the guide to learn the route. Then choose the number your shoe actually has:
- Run the starting section across the outside of the bottom row and feed the ends inward.
- Take one end up the inside to the next eyelet on the same side. Bring it out, cross horizontally and feed it into the eyelet opposite.
- The other end rises inside to the third row, leaving the second row free on that side. Bring it out and cross horizontally.
- Alternate ends: each rises along its side, skips one eyelet and forms the next bar on the outside.
- After completing the bars, bring both ends out through the top eyelets to tie. The top row is left for the knot.
The guide offers four, six or eight pairs. With an odd number, the finish needs adapting so you can bring the ends together to tie; Fieggen’s page shows alternatives. For tennis, I would not leave an eyelet unused just to preserve the look of the bars if it makes the shoe less secure.
Adjust each row separately. If you relieve the instep pressure but your foot starts shifting inside the shoe when you stop, the adjustment is not ready for play.
Bonus: learn the Berluti knot
Rethreading the eyelets changes the closure; changing the knot helps keep the bow tied. They are separate adjustments. Berluti describes its knot as having a double wrap at the centre.
To learn the version documented in Fieggen’s Berluti knot tutorial:
Knot workshop
Learn the Berluti knot in nine steps
Follow one action at a time. A is green and B is copper; keep both loops loose until the final step.
At crossings, the strand with an uninterrupted edge passes in front. Turn off the close-up to see the full route.
Step 1 of 9
Tie the starting knot
Cross B, on the left, over A, on the right, and finish the starting knot. Mirroring reverses both sides.
The extra Berluti move: feed the first loop through the centre again before tightening.
- Make the starting knot, passing the left end over the right.
- Fold the right end into a first loop.
- Wrap the left end around that loop and push a fold through the central opening, as you would for a regular bow. Leave it loose.
- Before tightening, take the first loop around the back as well and feed it through that central opening towards the front.
- Pull both loops to settle the double wrap.
You can also practise with the video “The World’s BEST Shoelace Knot! [The Berluti Knot]”. As Fieggen explains, different tutorials use the Berluti name for different knots; follow his sequence if you want that specific version.
Check that the loops and loose ends are a manageable length. If the lace barely reaches after adding a heel lock, get a longer lace before attempting a more involved knot.
Check the fit before your next match
Make one change at a time so you can judge its effect. For a practical check, wear your playing socks, adjust the shoes while standing and start with short lateral steps and gentle stops. Increase the pace only if the fit stays comfortable.
Look for three things: no uncomfortable heel lift, no foot sliding into the toe box as you stop, and no squeezed toes. In training, the aim is to repeat the footwork you need to build points in singles without having to reposition your foot inside the shoe.
Keep the lacing that solves the small fit problem without creating another. If holding your heel means squeezing your toes, or relieving your instep means letting your foot move around, reassess the shoe.
Keep learning
Turn this information into a better decision for your game
Explore more guides on the same topic or visit the complete archive to compare your options with context.
Continue reading
Related articles

Pro Stock Rackets: Do Pros Use What They Endorse?
What sits beneath a pro racket paintjob: endorsements, older molds, genuine model changes and pro stock frames—and what to check before buying.
Extra Duty vs Regular Duty Tennis Balls: Which Court?
Learn when to use Extra Duty or Regular Duty tennis balls on hard courts, clay, indoor courts, and grass, plus when altitude matters more than felt.

Tennis Racket Types: Power, Control and Spin
What separates power, control and spin tennis rackets, which specs matter, and what to demo based on your swing and typical miss.